
easynet Touch app for iPhone and iPad
[Introduction]
The easynet™ Touch is a mobile application that is designed to work with your easynet™ DVR. This App allows for live streaming, playback, and remote access to your surveillance cameras when connected to your local easynet™ DVR network via Wi-Fi or 3G/4G network.
[Note]
This App is an universal version for iPhone and iPad.
[Compatible NUVICO Products]
* ED-U1600 / U3200
* ED-P400 / P800 / P1600
* ED-C400 / C800 / C1600
[Key Features]
* Multi-channel live view display
* “Favorite View” for multi-site login management
* Multi-channel playback
* Instantaneous playback and time search
* PTZ control with multi-gesture
* Intuitive multi-gesture controls
* Camera title / current time & date / DVR status icons - Recording on/off, alarm, & video loss
* PTZ Control
[Instruction]
* Multi-site Management
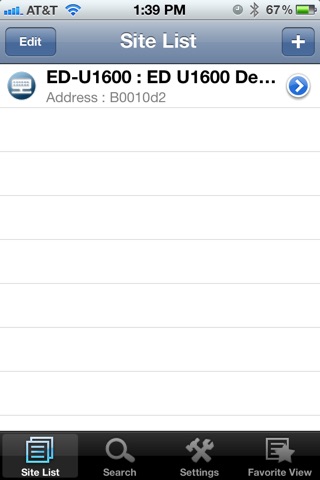
1. easynet™ Touch App makes it easy to manage multiple sites by allowing the user to view all DVRs (sites) on the first landing page (Site List). To add another site, just tap on the [+] button located at the top right corner.
2. To proceed directly to the camera selection, tap on the DVR or the site unit.
3. Click the [>] button to edit the site (unit) information, if necessary.
* Adding a Site
1. To add a site (unit) simply input the DVR IP Address (Host name), Port number (7000), User Name, and Password, then tap on the [Save] button located at the top right corner.
2. To cancel, tap the [Cancel] button to go back to the Site List.
* Channel List
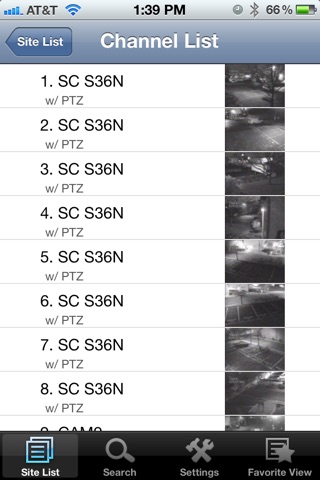
1. All the cameras connected to your easynet™ DVRs are listed in the Channel List. For Live View, tap anywhere on the line where the camera title is displayed.
2. For Instant Playback, tap on the [>] button.
[Note]
Instant Playback displays video approximately 1 minute prior to the present time. To playback video of more than 1minute prior to the time, simply tap the Search option icon located on the tab bar at the bottom of the interface.
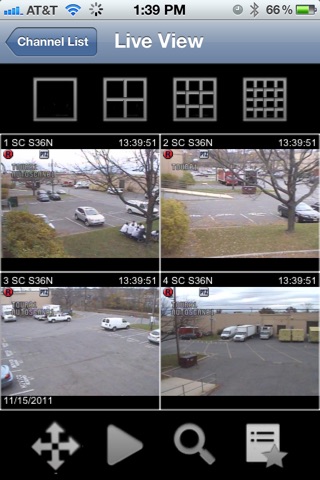
* Live View & Instant Playback
1. During Live View or Instant Playback, change the layout from full screen to 2x2, 4x4, etc., by selecting on the OSD. (Display mode)
2. To change the view to the next set of cameras on the screen, simply swipe your finger on the screen from left to right or vice versa.
3. To go back to the Channel List, just tap on the screen once and the tab bar containing the [Channel List] button will appear on top of the video window.
3. To control PTZ function, select PTZ icon and tap on the desired screen.
* Easy Time Search
1. When an Instant Playback of 1 minute is not enough and you need to go back further, the Search option should be used. To view the recorded video from a specific camera from a specific time and date, first tap on the [Search] button located at the bottom tab bar. Once in Search mode, select the desired site (DVR), and then the camera.
2. Using the dial (picker), change the time and date by moving your finger in an upward or downward motion in the appropriate column to the desired time period.
3. Once set to the desired time and date, tap on the [>] right arrow button located at the top right corner to display the video recorded from that time period.
To search different time and/or date, tap on the screen once again and press the button that appears on the top left corner to go back to the time and date dial.
* Favorite View
1. Create a list of your most frequently viewed cameras by pressing the [Favorite View] icon located at the bottom tab bar.
2. To add cameras to this list, tap on the [+] button located at the top right corner and specify the site (unit) and camera.
[Note]
The site (unit) and camera must already be added on Site List in order to be added to the Favorite View.
3. Once added, the camera title and DVR information will be displayed along with its host name.
[Release Note]
Version 1.0: released on 09/26/2011
Version 1.2: released on 10/11/2011